Are you tired of juggling multiple operating systems to get your development work done? Look no further! With the Windows Subsystem for Linux (WSL), you can bring the power of Linux right to your Windows desktop. In this article, we'll guide you through setting up a WSL development environment, courtesy of Microsoft Learn, and explore how it can revolutionize your coding workflow.
What is WSL?
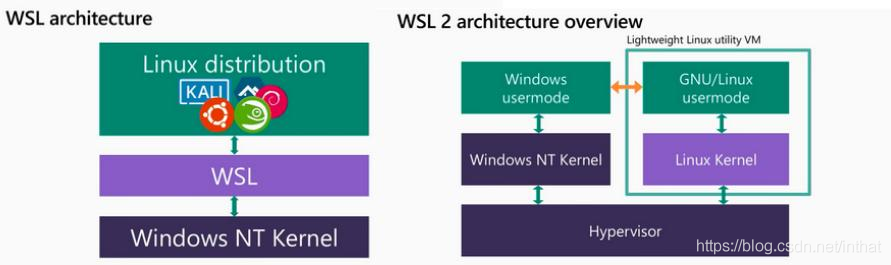
WSL is a compatibility layer that allows you to run Linux binary executables natively on Windows 10 and Windows 11. This means you can install a Linux distribution, such as Ubuntu, Debian, or Kali Linux, directly on your Windows machine, without the need for virtualization or dual-booting. WSL provides a seamless integration between Windows and Linux, enabling you to leverage the strengths of both operating systems.
Benefits of a WSL Development Environment
Setting up a WSL development environment offers numerous benefits, including:
Improved productivity: With WSL, you can work on Linux-based projects directly on your Windows machine, eliminating the need to switch between operating systems or use virtual machines.
Enhanced flexibility: WSL allows you to run multiple Linux distributions side-by-side, making it easy to test and develop applications across different Linux environments.
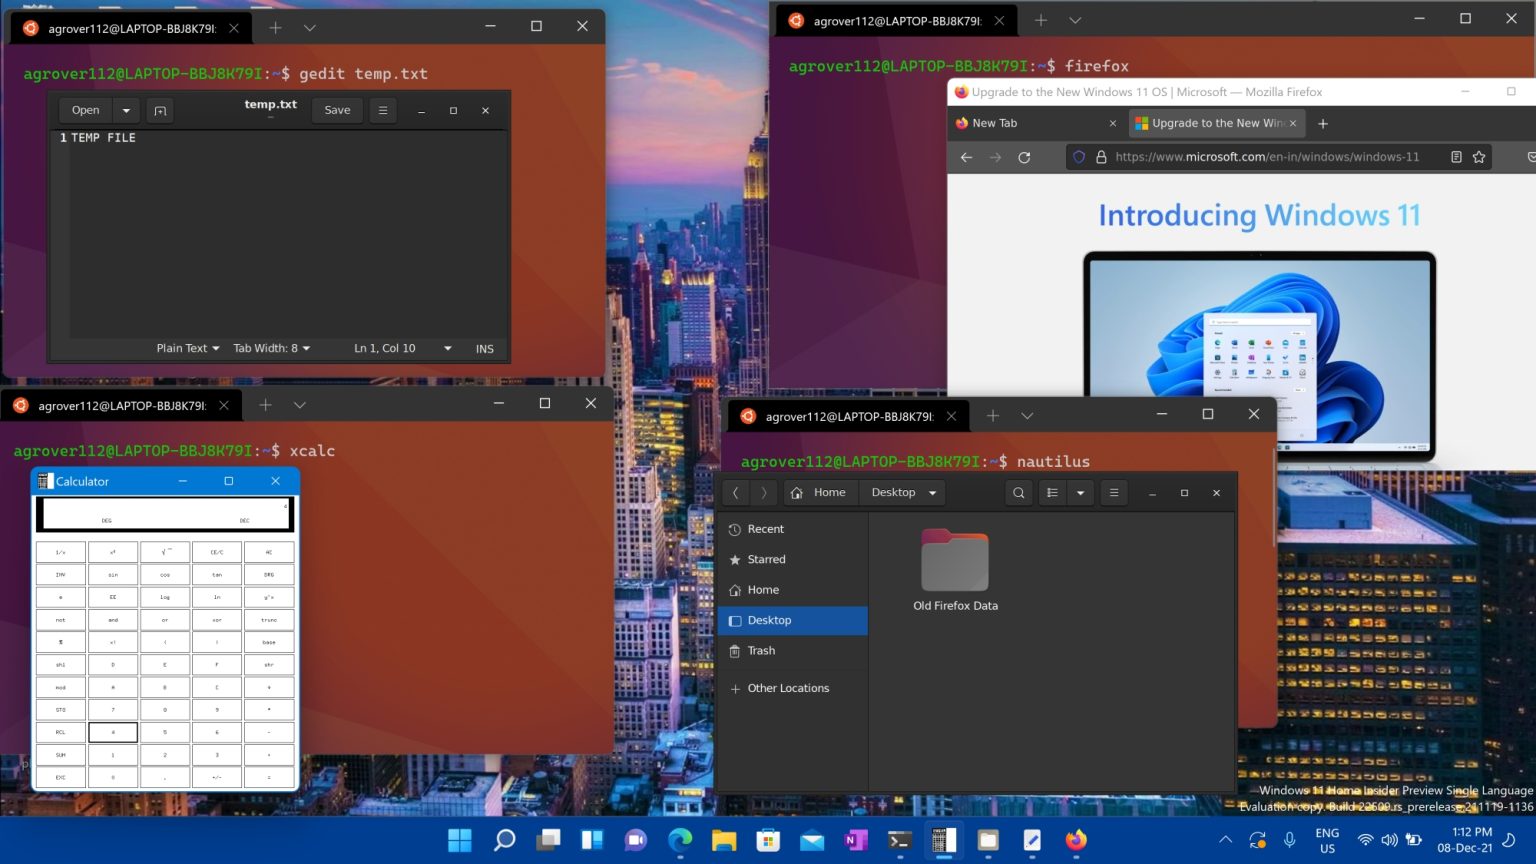
Streamlined workflow: WSL integrates perfectly with Windows, enabling you to use your favorite Windows tools and editors, such as Visual Studio Code, while still leveraging the power of Linux.
Setting Up Your WSL Development Environment
To get started with WSL, follow these simple steps:
1.
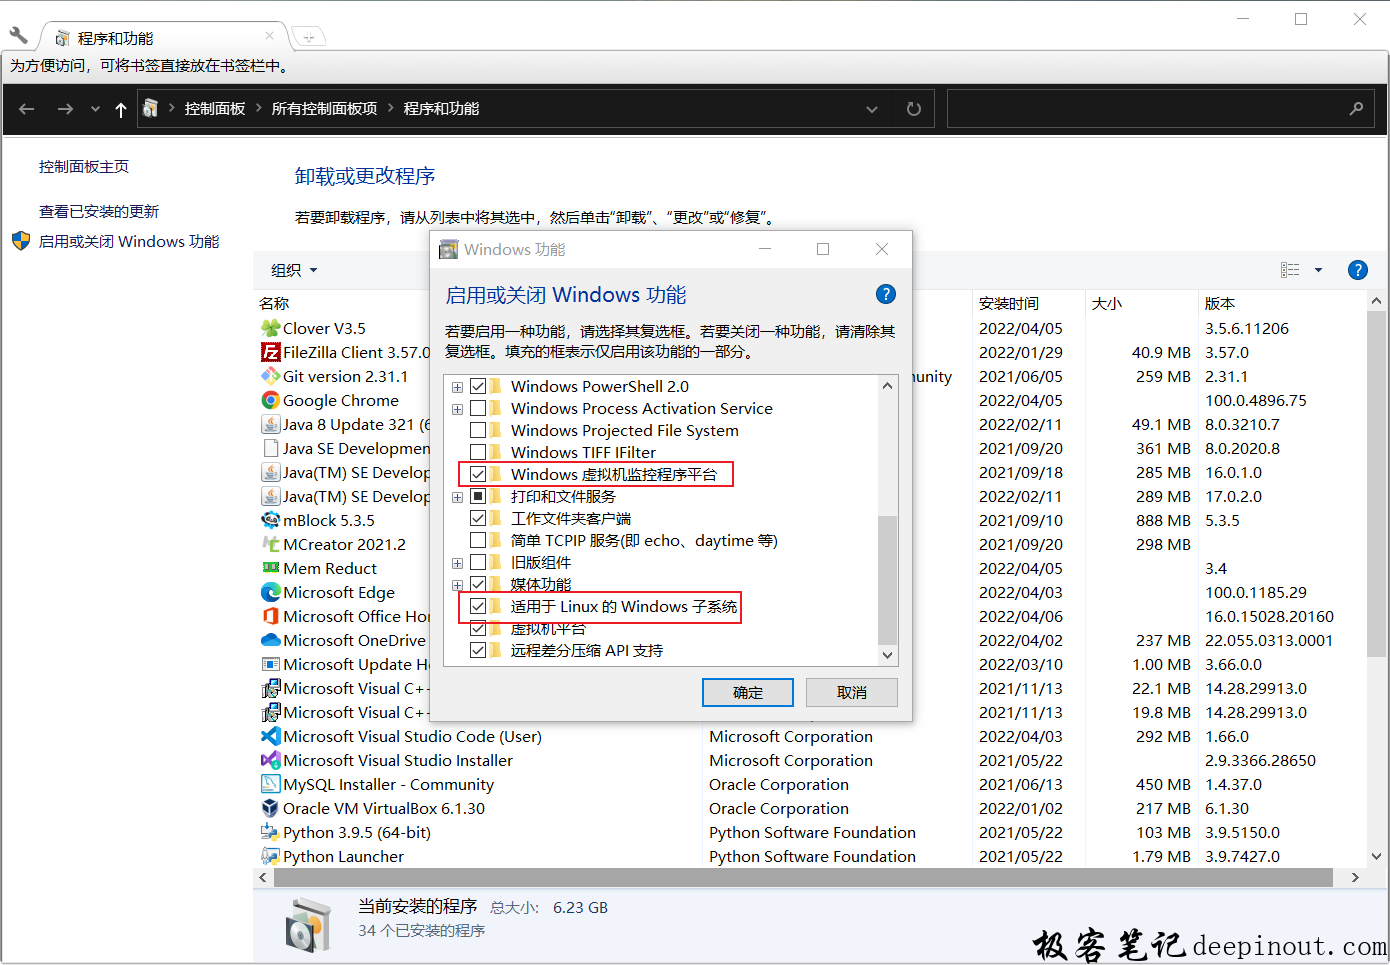
Enable WSL: Open the Start menu, search for "Turn Windows features on or off," and check the box next to "Windows Subsystem for Linux."
2.
Install a Linux distribution: Open the Microsoft Store, search for your preferred Linux distribution (e.g., Ubuntu), and click "Install."
3.
Initialize your Linux distribution: Once installed, open your Linux distribution and follow the prompts to set up your username, password, and other basic settings.
4.
Install essential tools and software: Use the package manager (e.g., apt-get for Ubuntu) to install necessary development tools, such as Git, Node.js, and your favorite code editor.
Getting Started with Microsoft Learn
Microsoft Learn offers a wealth of resources to help you get started with WSL and improve your development skills. With Microsoft Learn, you can:
Explore tutorials and guides: Dive into step-by-step tutorials and guides on setting up WSL, using Linux commands, and developing applications.
Take online courses: Enroll in courses on Linux development, DevOps, and other related topics to enhance your skills and knowledge.
Join the community: Connect with other developers, ask questions, and share your experiences in the Microsoft Learn community.
Setting up a WSL development environment is a straightforward process that can significantly boost your productivity and flexibility as a developer. With WSL, you can harness the power of Linux on your Windows machine, while still enjoying the benefits of your favorite Windows tools and editors. By following the steps outlined in this article and leveraging the resources available on Microsoft Learn, you'll be well on your way to unlocking efficient coding and taking your development skills to the next level.
Get started with WSL today and discover a world of possibilities!


![[WSL] 通过 WSL 在 Windows 10 上运行 Linux GUI 应用_wsl 3d加速-CSDN博客](https://img-blog.csdnimg.cn/20210422183628927.png?x-oss-process=image/watermark,type_ZmFuZ3poZW5naGVpdGk,shadow_10,text_aHR0cHM6Ly9ibG9nLmNzZG4ubmV0L1hpZUVEZUhlaVNob3U=,size_16,color_FFFFFF,t_70#pic_center)